
In this blog post, we simplify the process of installing picture frame hardware with an easy-to-follow tutorial. Whether you're using sawtooth hangers, D-rings with wire, or security hardware, our step-by-step guide covers everything you need to know. With expert tips and clear instructions, you'll have your custom frame securely hung in no time! Perfect for both beginners and seasoned decorators, this guide ensures your art or photos will be beautifully displayed with confidence.
At FrameWorthy, we’re dedicated to making custom framing accessible and effortless for everyone. We ship our handcrafted picture frames, shadow boxes, and canvas frames straight to your door, complete with everything you need to display them beautifully. While installing your hanging hardware might seem tricky, our easy-to-follow instructions will have your frames on the wall in no time!
Follow the steps below to install the hanging hardware onto your custom frame!
Important Note: Hanging Canvas Frames
Before installing hanging hardware on a canvas frame, make sure your canvas is properly installed using canvas clips or offset clips. Check out our guide to installing canvas into a canvas frame if you need help.
Sawtooth Hangers: Ideal for Small, Lightweight Frames
Sawtooth hangers are a popular and reliable choice for hanging small to medium-sized, lightweight frames. These hangers are designed to be simple, yet effective, making them a go-to solution for frames that don’t require heavy-duty support. Typically, sawtooth hangers are attached directly to the back of the frame, and their jagged teeth allow the frame to catch onto a single nail or hook in the wall with ease.
One of the greatest advantages of sawtooth hangers is their versatility. They work well for photo frames, small art pieces, and even certificates or documents that are framed and ready for display. Because they are centered on the back of the frame, sawtooth hangers keep the frame balanced, ensuring that it hangs evenly on the wall without the need for constant adjustments.
Another benefit of sawtooth hangers is how unobtrusive they are. Once installed, they remain out of sight, giving your frame a clean and professional appearance. This hardware is also quick and easy to install, requiring only a hammer and a few minutes of your time. Whether you’re hanging a single frame or arranging a gallery wall, sawtooth hangers provide a hassle-free way to securely mount your custom frames.
With sawtooth hangers, you can enjoy a seamless hanging experience that enhances the display of your cherished art or photos, all while keeping things neat and simple.

What's Included in Your Sawtooth Hanger Packet:
- Sawtooth hanger(s)
Additional Tools You’ll Need:
- Hammer
- Measuring tape or ruler
- Pen or pencil
How to Install Sawtooth Hangers
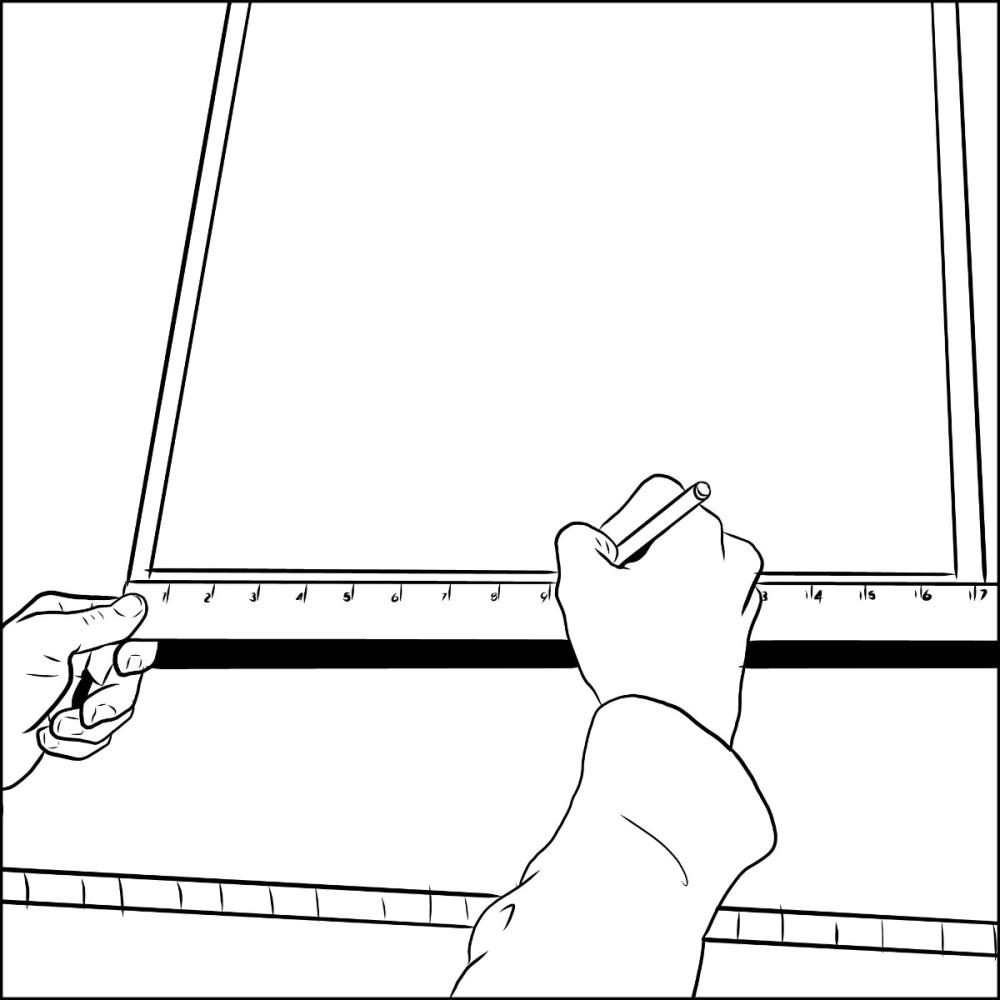
Step 1: Measure the Frame
Use a measuring tape or ruler to measure the top of your frame. Find the center point, as this will ensure your frame hangs evenly.
Step 2: Mark the Center
Once you’ve located the center point, mark it lightly with a pen or pencil.
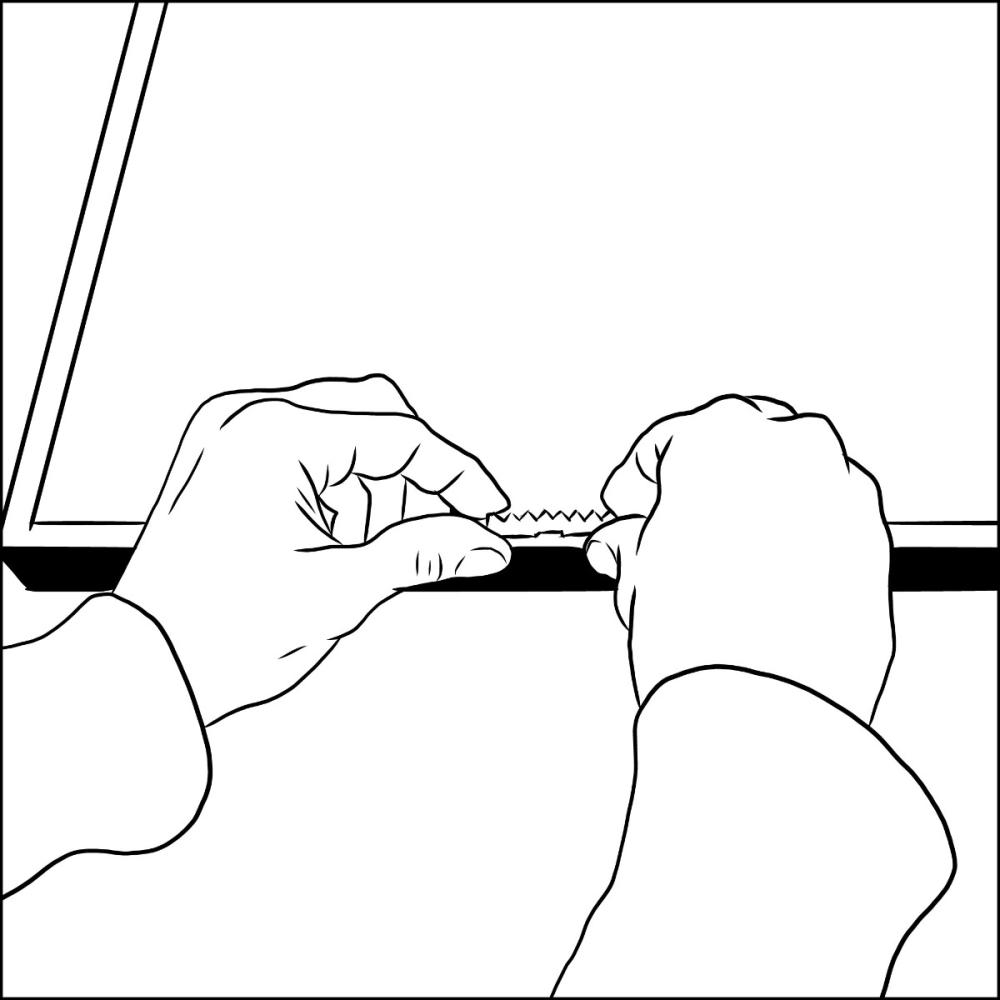
Step 3: Align the Hanger
Position the sawtooth hanger with the teeth facing the bottom of the frame, lining it up with your center mark.
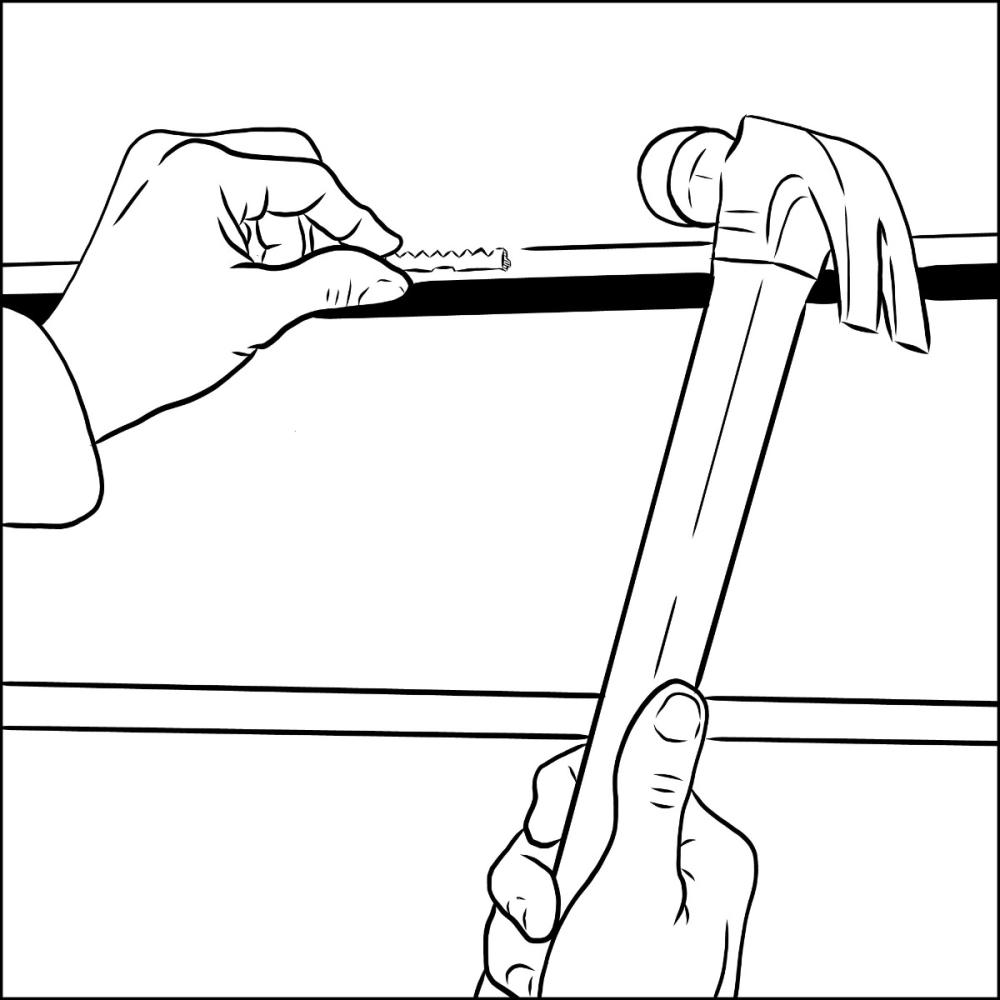
Step 4: Hammer in the Hanger
Lightly hammer the ends of the sawtooth hanger into the back of the frame. Be careful not to apply too much force.
Step 5: Hang Your Frame
Place a nail in the wall where you want your frame to hang, and carefully position the sawtooth hanger on the nail.
D-Ring Hangers: Versatile for All Frame Sizes
D-ring hangers are one of the most versatile and durable options for hanging frames of all sizes, from small photo displays to large, heavy art pieces. Unlike other hanging hardware, D-rings offer exceptional flexibility in how they are used. They can be installed on the back of the frame for direct hanging or combined with wire for extra support, depending on the weight and size of your frame.
One of the key advantages of D-ring hangers is their strength. Each D-ring is equipped with multiple screw holes, allowing you to use more than one screw for reinforcement. This feature minimizes the risk of hanger failure, as it distributes the weight of the frame more evenly across the back. For larger and heavier frames, this added security is essential, ensuring your art stays firmly anchored to the wall without the risk of tear-out.
D-rings are also highly adaptable when it comes to different hanging configurations. If you prefer a sleek, flush-mount look, D-rings can be installed directly onto the back of the frame and hung from two wall hooks, creating a stable, level presentation. Alternatively, for larger or more delicate frames, you can attach wire between the two D-rings. The wire provides a slight amount of slack, making it easier to hang the frame from a single hook or nail while maintaining balance.
In addition to their strength and flexibility, D-ring hangers are unobtrusive, making them ideal for both contemporary and traditional frames. Once installed, they remain hidden from view, allowing your frame to take center stage without any visible hardware detracting from its aesthetic appeal.
Whether you’re hanging a light frame in a cozy nook or a heavy statement piece in your living room, D-ring hangers offer a reliable, sturdy, and customizable solution to ensure your art or photos are displayed securely and beautifully.
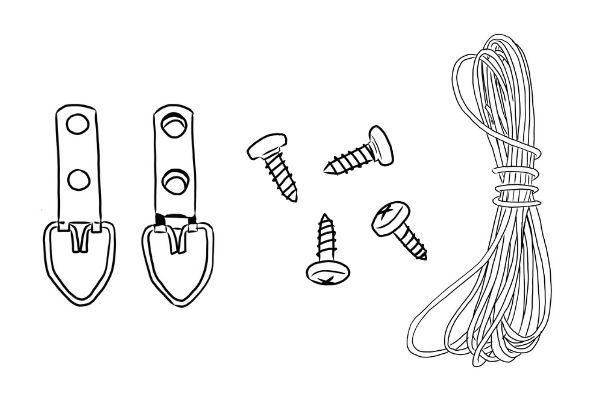
What's Included in Your D-Ring Packet:
- D-rings
- Screws
- Hanging wire
Additional Tools You’ll Need:
- Screwdriver
- Wirecutters
- Measuring tape or ruler
- Pen or pencil
How to Install D-Ring Hangers
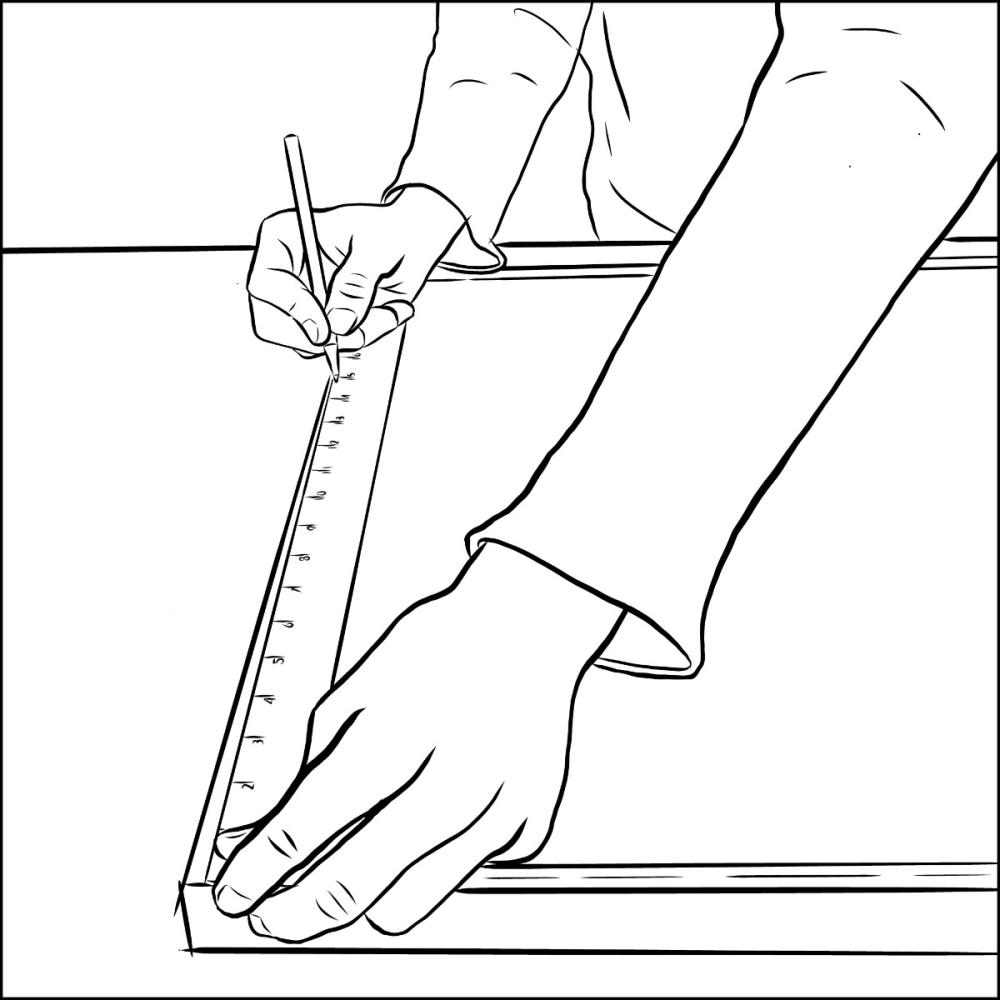
Step 1: Measure and Mark the Frame
Measure 1/3 of the way down from the top of your frame on both sides. Make small marks at these points with your pen or pencil.
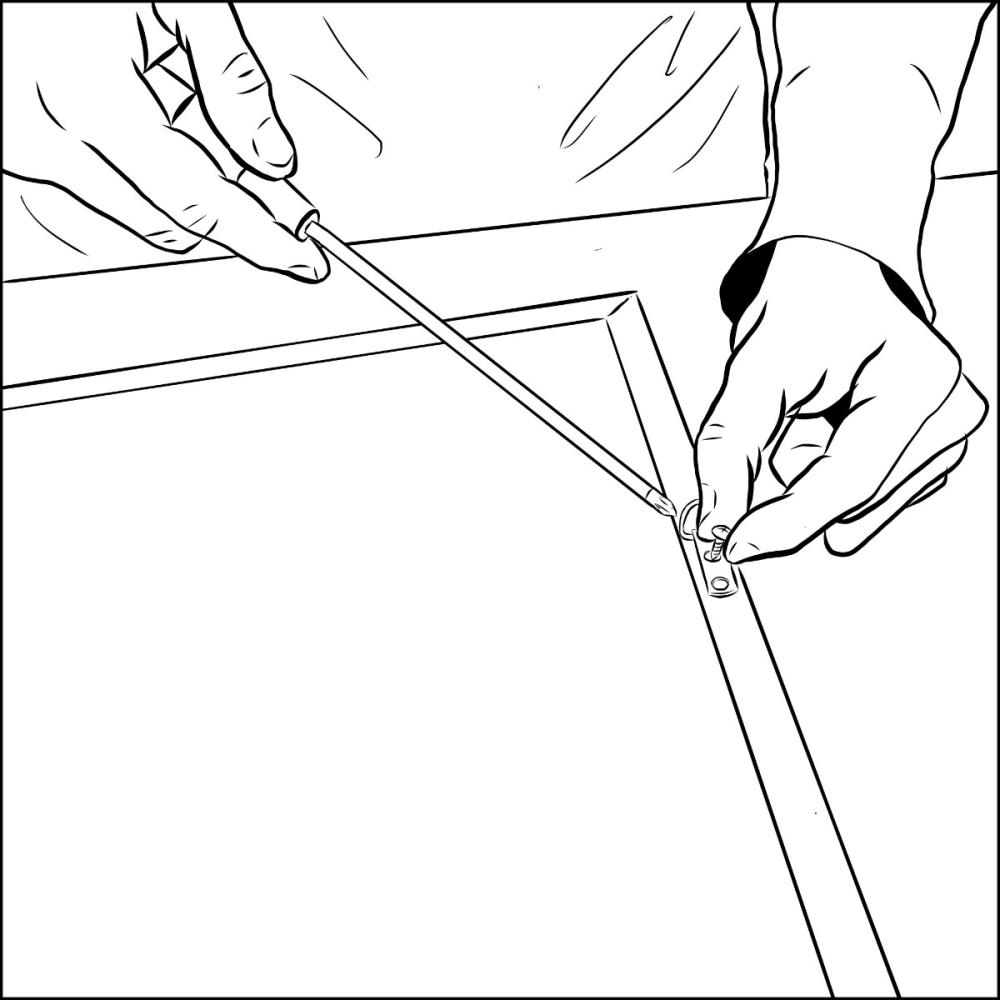
Step 2: Attach the D-Rings
Using the provided screws, attach one D-ring to each side of the frame at your marked points. Ensure that the rings are facing up.
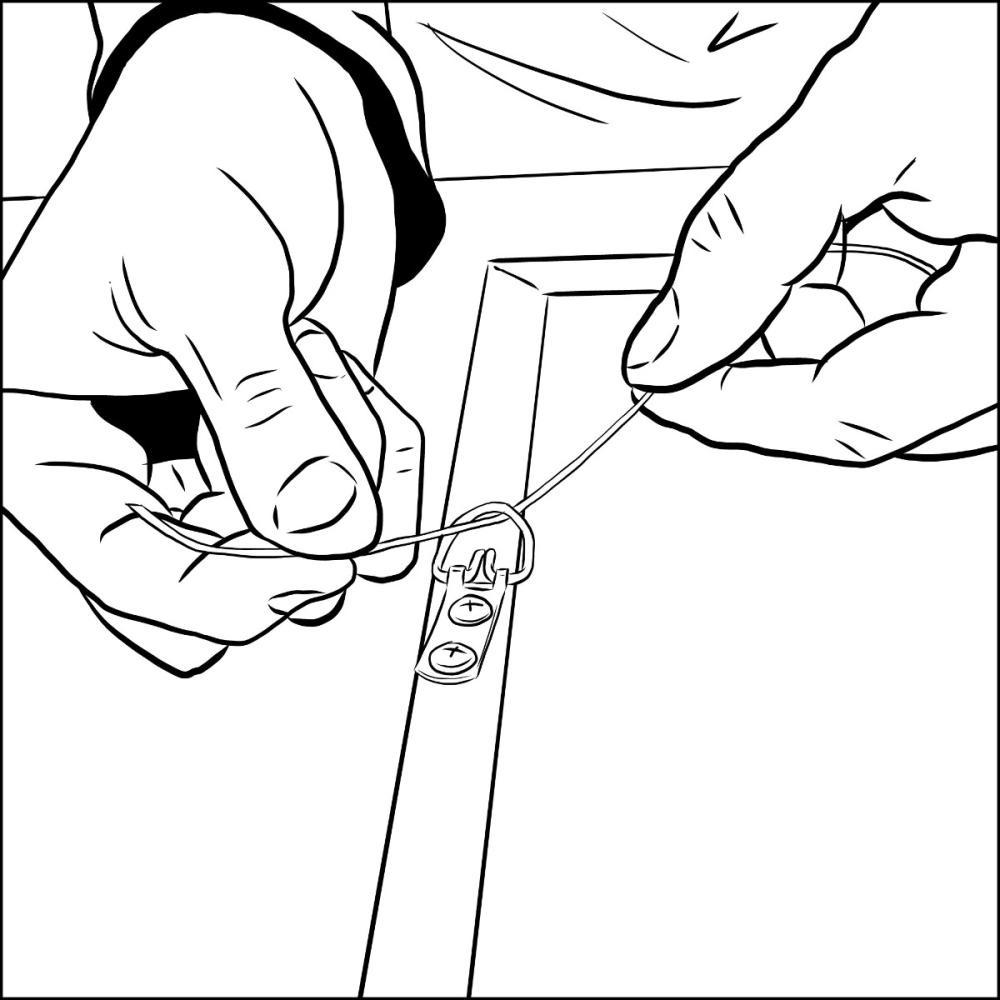
Step 3: String the Wire
Thread the wire through the first D-ring, leaving about 2 inches of slack for adjustment. This extra length allows for secure wrapping.
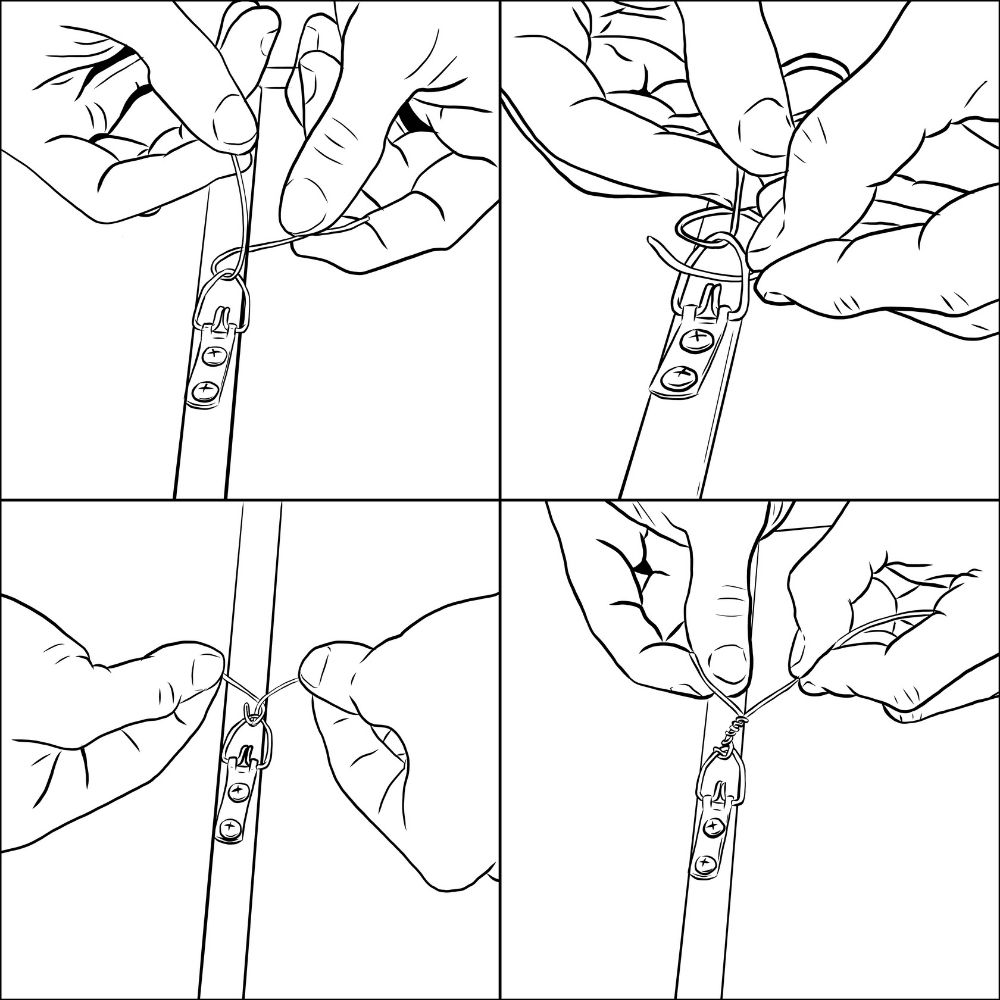
Step 4: Secure the Wire
Loop the wire through the D-ring a second time and wrap it around itself to secure it tightly.
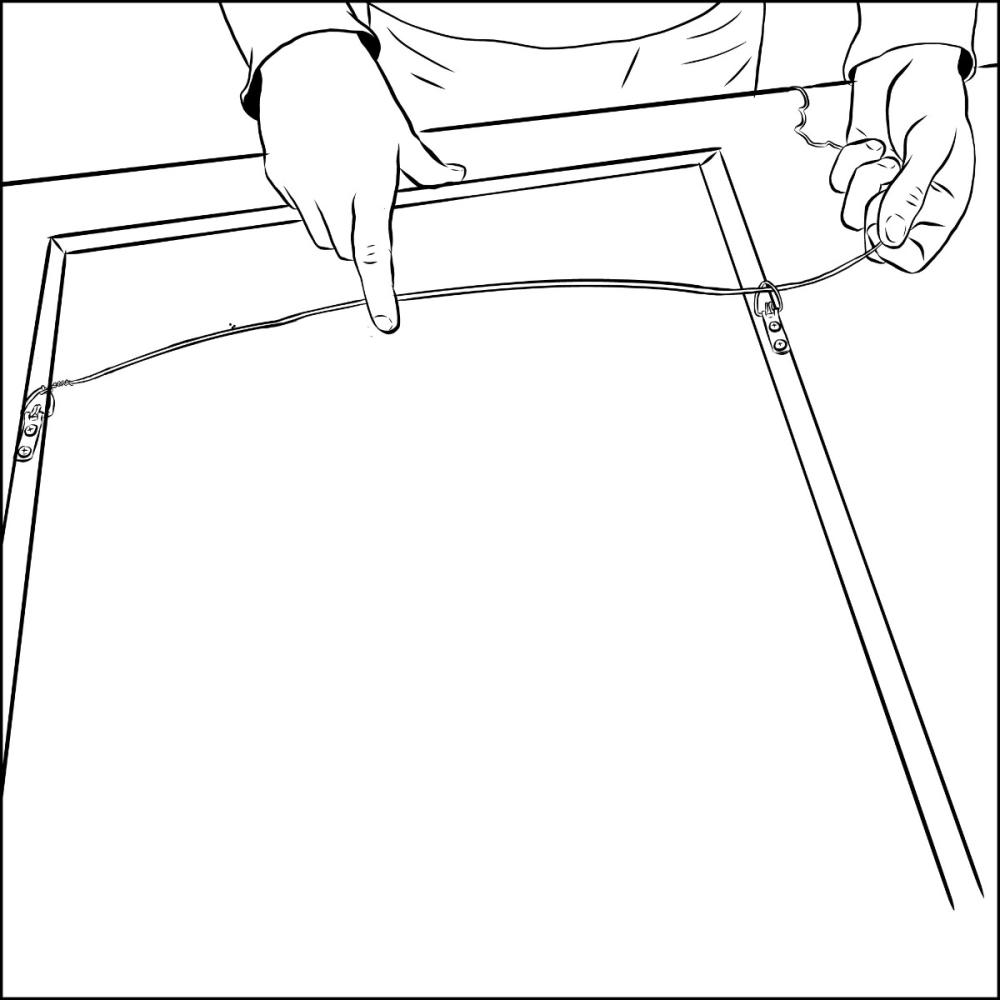
Step 5: Stretch the Wire Across
Extend the wire across the back of the frame to the second D-ring. Leave some slack in the wire to allow for hanging without excessive tension.
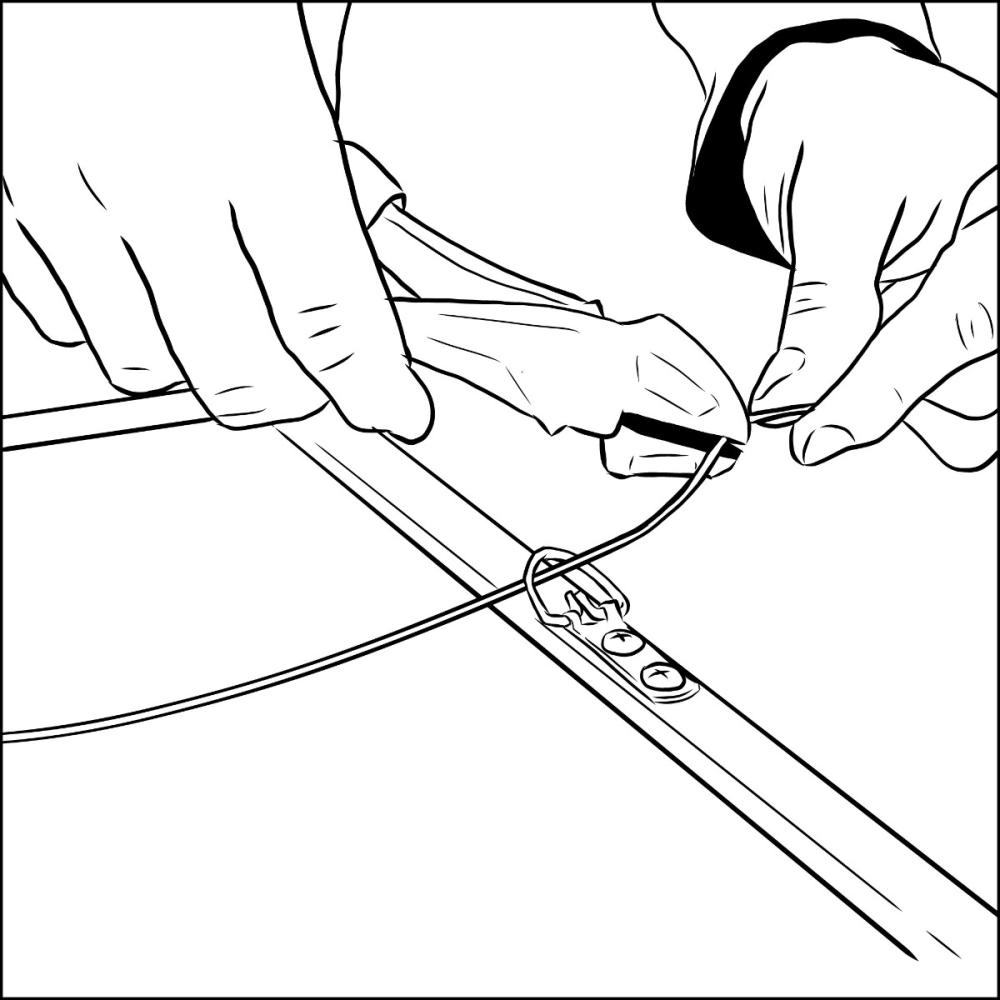
Step 6: Attach the Wire to the Second D-Ring
Thread the wire through the second D-ring, leaving another 2 inches of slack. Trim the excess wire and secure it by looping it through a second time and wrapping it around itself.
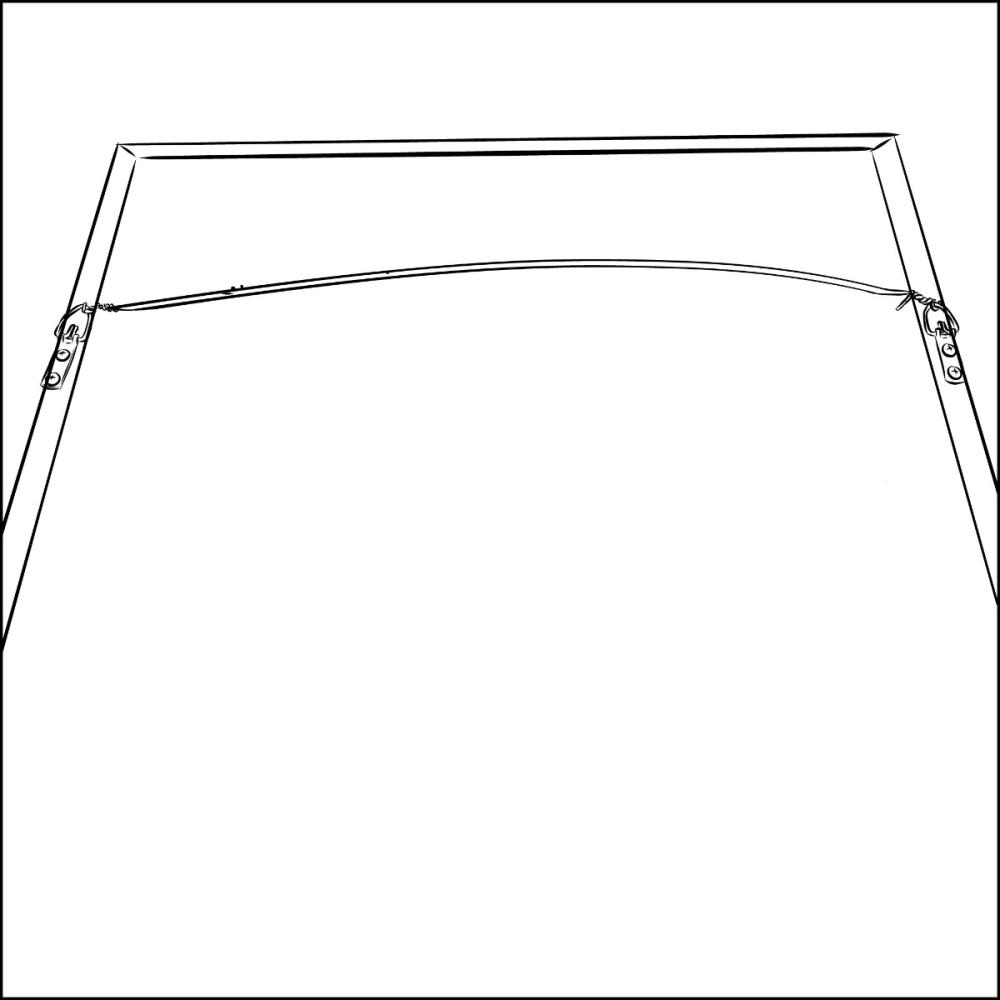
Step 7: Hang Your Frame
Once the wire is securely attached, you’re ready to hang your frame. Simply place the wire over a hook or nail on the wall, and adjust as needed for balance.
Need Help?
If you have any additional questions about installing hardware or hanging your custom frames, don’t hesitate to reach out. Our team of framing experts is always here to assist you. Contact us at hello@frameworthy.com for personalized support.
At FrameWorthy, we’re committed to making custom framing easy and accessible, ensuring your framed artwork looks its best in your home.

The FrameWorthy.com Team is made up of expert framers with years of experience in the art of custom framing. Passionate about preserving your cherished memories, artwork, and keepsakes, their valuable insights, tips, and tricks come from a deep understanding of framing techniques, materials, and design. Whether you're looking for the perfect frame style, matting options, or advice on protecting your items, the FrameWorthy team is dedicated to making custom framing easy and accessible. Trust their expertise to guide you in creating beautiful, lasting displays for your home, office, or gallery.


