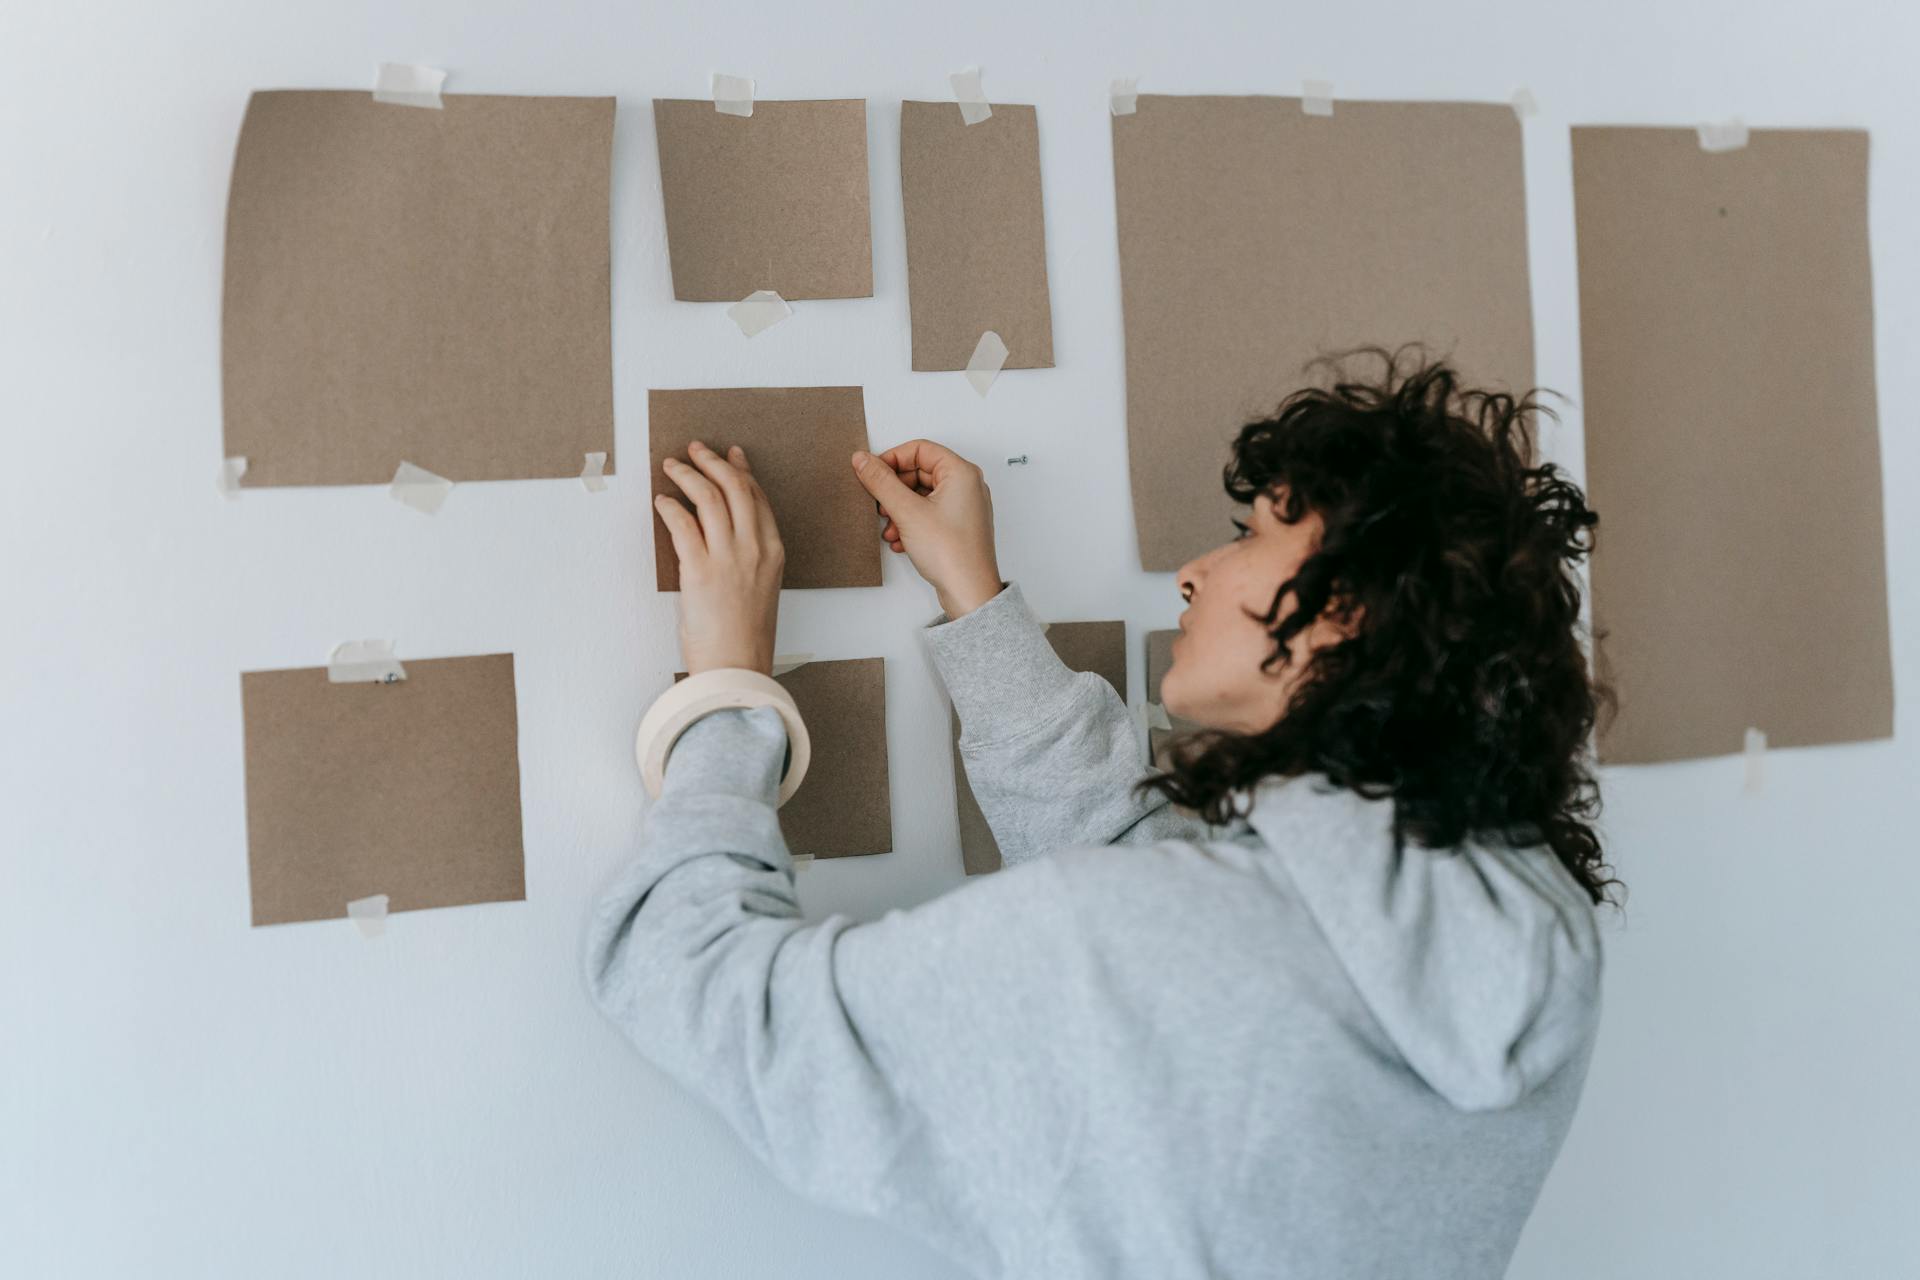
Gallery walls have a way of demanding attention. They inject pattern and color to a home and showcase who you are and what you love. It’s easy to see why so many love them. But, they can seem intimidating to create. Where do I start? How do I hang it? And, oh, all the nail holes!! It doesn’t have to be scary. I’m going to take you through my three favorite layouts and give you some helpful tips on how to hang a gallery wall of your very own.
A well-curated gallery wall can instantly elevate any room, injecting personality, color, and charm into your space. Whether you’re displaying family photos, fine art, or a mix of memories and mementos, gallery walls allow you to showcase what you love in a way that feels intentional and stylish. But creating one from scratch can seem intimidating. Where do you start? How do you hang it? Fear not—FrameWorthy is here to help with expert tips for creating and hanging the perfect gallery wall in your home.
Step 1: Choose Your Gallery Wall Style
Before you start hammering nails into your walls, it’s crucial to decide on the overall style and layout of your gallery wall. Taking the time to plan your approach can make all the difference in how cohesive and polished the final display looks. Your gallery wall can reflect your personality, the vibe of the room, or a specific theme, so it’s essential to consider a few key factors before getting started.
First, think about the space where the gallery wall will be featured. Is it a small hallway, a spacious living room, or perhaps a stairwell? The layout you choose should fit the dimensions and flow of the room. For example, in a small space, a tight, organized grid layout might work best to keep things looking clean, while a larger room may benefit from a more spread-out or collected style to fill the wall more dynamically.
Next, consider the artwork or photos you want to display. Do you want a uniform look with frames that match in size and style, or are you aiming for a more eclectic mix of different frames and artwork? The type of artwork or photographs you’re displaying can guide the style as well. A series of family portraits, for instance, might look stunning in a symmetrical grid, while a mix of abstract art and sentimental items could shine in a collected, organic layout.
Finally, the aesthetic of the room itself can help shape the style of your gallery wall. Are you going for a modern, minimalist look, or do you want something more eclectic and playful? Matching the style of the gallery wall to the decor and feel of the space will ensure that it enhances rather than overwhelms the room.
By planning out the style and layout in advance, you’ll be able to achieve a more intentional and visually appealing gallery wall that perfectly complements your space.
Here are three popular layouts:
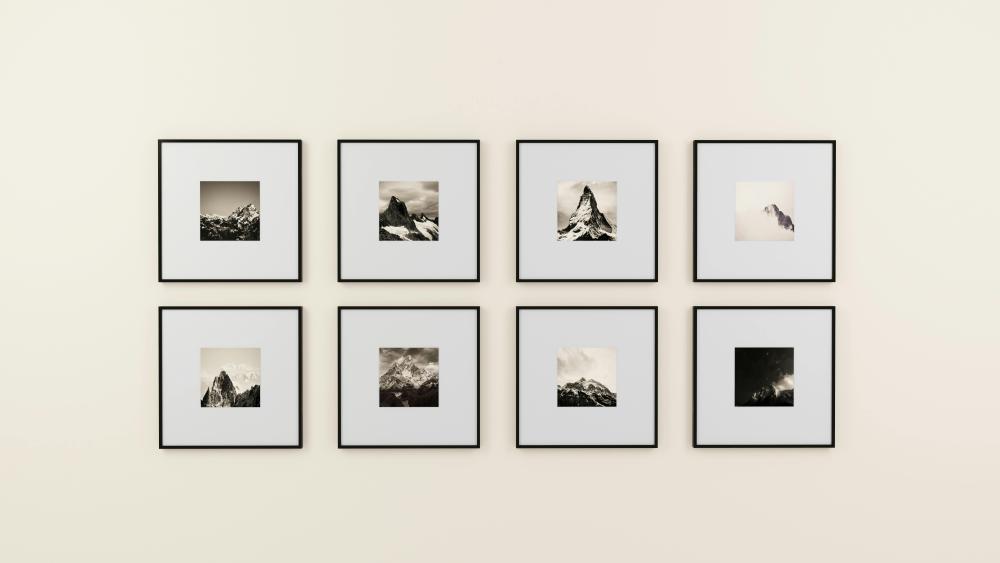
1. Grid Layout
A grid layout is perfect for those who love order and symmetry. Frames of the same size and style are arranged in straight lines with even spacing, creating a clean and organized look. This layout works best for a collection of similarly themed images, such as black-and-white photos, a series of landscape prints, or family portraits.
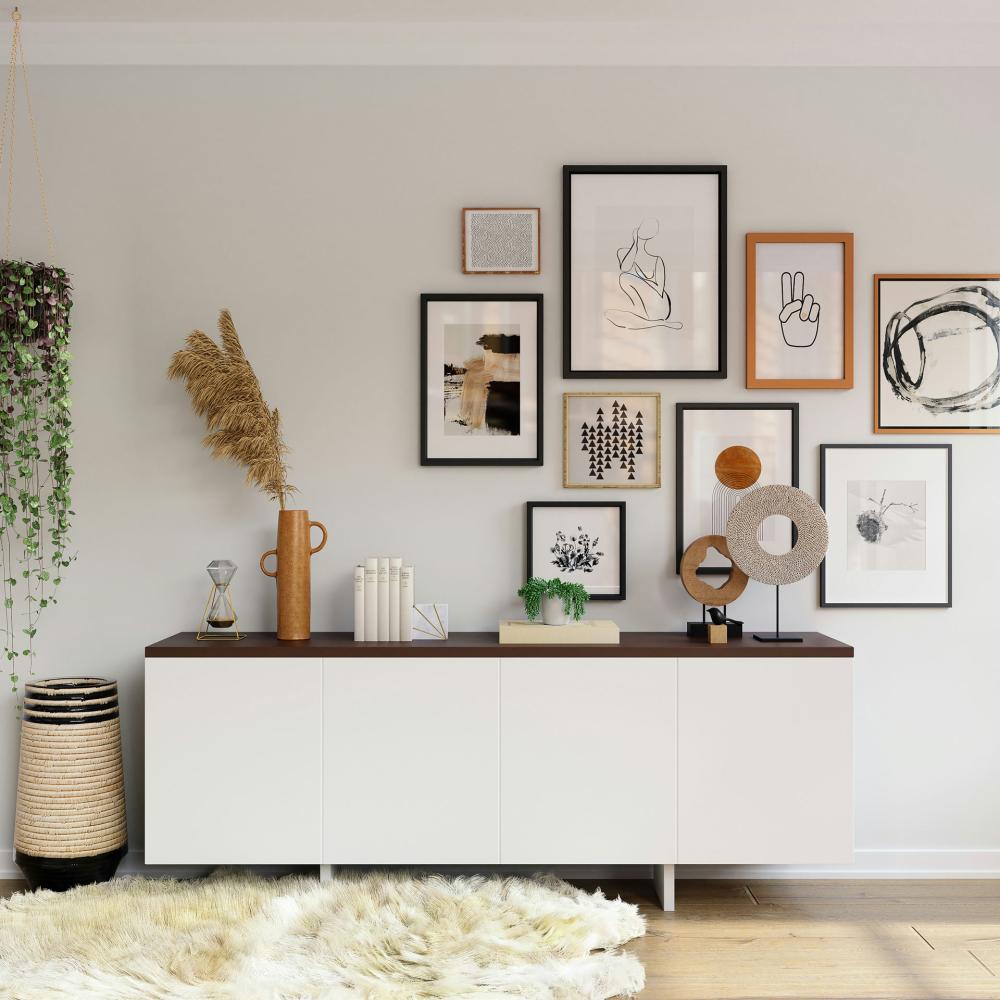
2. Staggered Layout
For a slightly more relaxed yet structured look, consider a staggered layout. Here, you use two or more frame sizes, alternating between vertical and horizontal orientations. The staggered arrangement creates movement and visual interest while still maintaining a sense of balance.
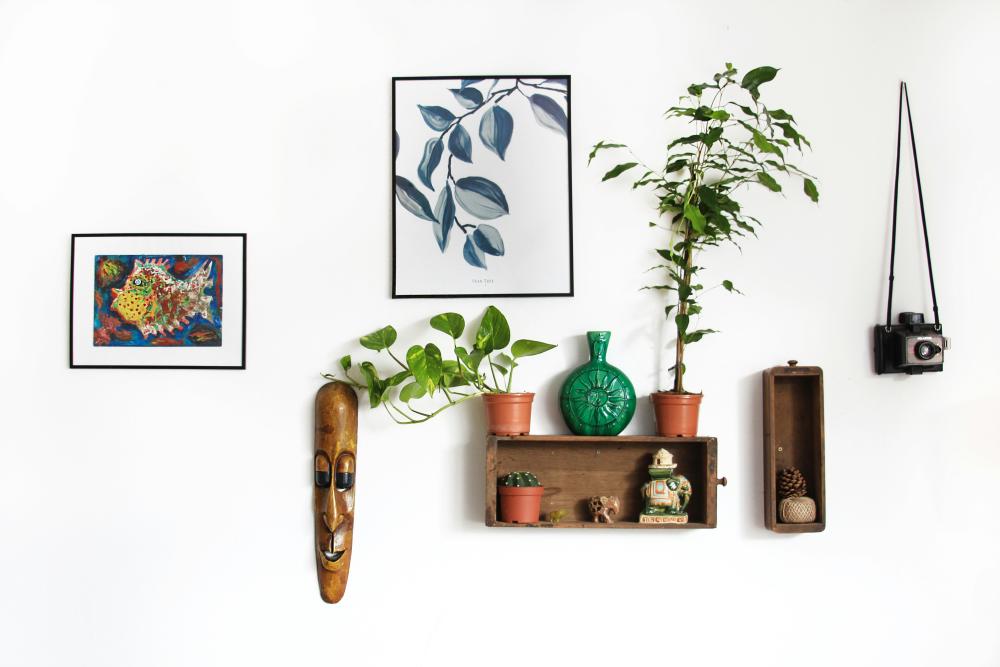
3. Collected Layout
If you love an eclectic, lived-in look, the collected layout is ideal. This arrangement feels like it was assembled over time, with mismatched frame styles and sizes creating an organic, charming display. It’s a great way to showcase a mix of photos, artwork, and even small objects, adding a sense of whimsy and warmth to your space.
Step 2: Plan Your Layout
Once you’ve decided on a style for your gallery wall, it’s time to plan the layout. This is a crucial step for avoiding unnecessary holes in your walls and ensuring that the final result looks polished and intentional. A well-thought-out layout will also help keep your frames evenly spaced and balanced, no matter how eclectic or uniform the arrangement is.
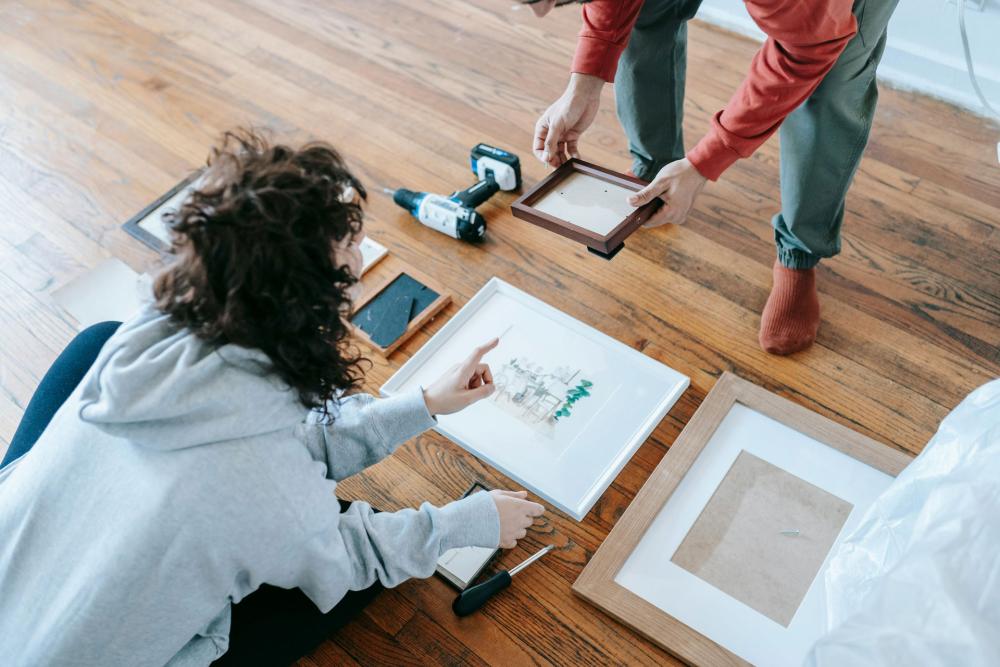
- Lay it out on the floor: Start by laying all of your frames and artwork on the floor in front of the wall where they will be hung. This allows you to easily visualize the layout and make adjustments without committing to putting holes in the wall just yet. Try out different arrangements until you find one that feels right. This step is especially helpful for collected-style gallery walls, where frames may vary in size and shape. Play around with spacing and placement—sometimes the most unexpected combinations create the most interesting results. Don't rush; take your time to get the look just right.
- Take a photo: Once you’re happy with the floor arrangement, grab your phone and take a picture of the layout. This will serve as your guide when it’s time to hang the frames on the wall. The photo acts as a reference, so if you need to pause or move frames around during the hanging process, you won’t lose track of the design. A quick glance at your reference picture will remind you exactly where each frame goes.
- Mark the center: The next step is to find the center point of your wall, which will serve as your starting point. Grab a tape measure and measure the width of the wall where you plan to hang the gallery. Mark the center point lightly with a pencil. This central mark will be your anchor as you start to build out your gallery wall, ensuring the layout is balanced and symmetrical, or giving you a focal point to work outward from for more freeform styles. If your gallery wall will have a specific focal piece, it’s often best to start with that piece in the center and arrange the others around it.
By carefully planning your layout on the floor, using a reference photo, and marking the center of the wall, you'll save yourself time and frustration while achieving a gallery wall that looks thoughtfully curated and well-executed.
Step 3: Hang Your Frames
Now that you've planned your gallery wall layout and marked the center, it's time to start hanging those frames! For a flawless installation, follow these steps to transfer your floor layout to the wall and ensure your frames are level, evenly spaced, and perfectly placed.

Create Templates for Easy Frame Placement To make the process easier and avoid guesswork, you can create paper templates for each frame. This step is especially helpful if you have a lot of frames or an intricate layout. Here’s how:
- Trace the Frames: Grab some butcher paper or any large paper you have handy. Place each frame face down on the paper and trace around its edges. Cut out the shape, and mark where the hanging hardware is located on the back of the frame.
- Tape to the Wall: Once you’ve cut out your frame templates, tape them to the wall using painter’s tape. Arrange them based on your floor layout, adjusting as needed to make sure everything looks even and balanced. This method allows you to visualize the finished gallery wall without committing to any nails just yet. It’s also a great way to ensure your spacing is consistent between all frames.
- Step Back and Adjust: After you’ve taped all the templates to the wall, take a step back and look at your design from a distance. This will give you a better idea of how the gallery wall will look when finished. Make any adjustments now before hammering nails or making holes. Once you’re happy with the placement, you’re ready to start hanging the real frames.
Use Painter’s Tape for Perfect Hardware Placement After creating your templates or if you choose to skip that step, you can also use painter’s tape for precise hardware placement.
- Mark Hanging Hardware: Tear a piece of painter’s tape slightly wider than your frame. Place the tape across the back of your frame, sticky side up, and mark the positions of the hanging hardware (like D-rings or sawtooth hangers). This step ensures your nail placement will be exact.
- Transfer to the Wall: Now, carefully transfer the tape from the back of the frame to the wall, ensuring it’s level. Press the tape into place. This gives you the exact spot to hammer your nails or insert wall anchors.
- Level Each Frame: Start by hanging your first frame in the center of your gallery wall. Use a level to make sure it’s perfectly straight before hammering in the nails. Once it’s level and secure, hang the frame.
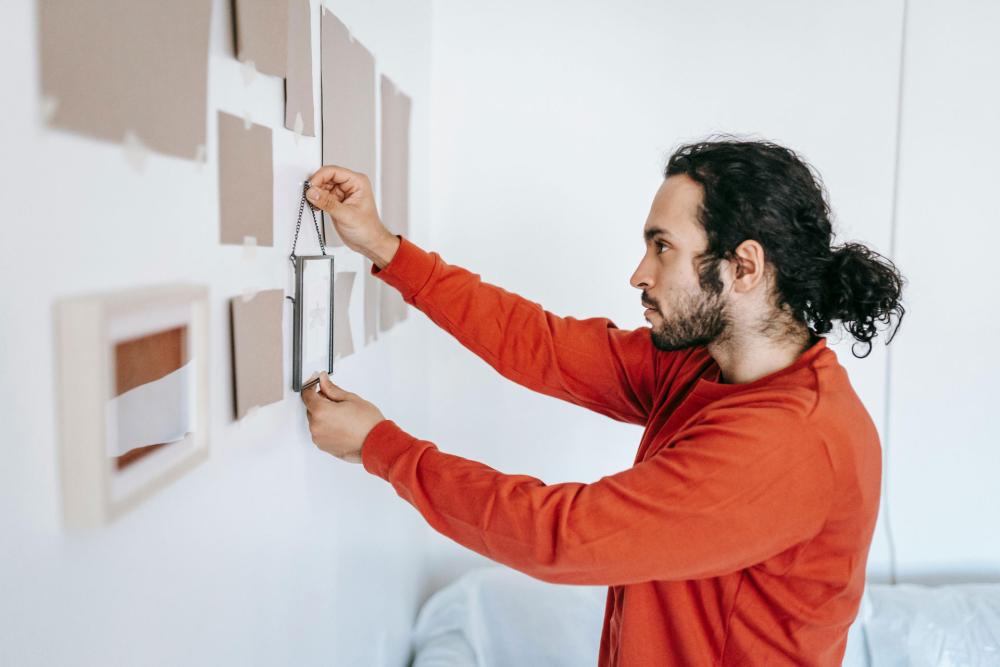
Maintain Consistent Spacing To keep your gallery wall looking cohesive and not cluttered, aim for consistent spacing between frames. A good rule of thumb is to leave 2-3 inches between each frame. Use a measuring tape to ensure this spacing is uniform, whether you’re hanging large or small frames. Consistent spacing creates a sense of balance and helps the gallery wall flow nicely.
Start from the Center and Work Outward Once the center frame is in place, use it as your anchor to build out the rest of your gallery wall. Starting from the center keeps everything aligned and prevents the wall from looking lopsided. Hang your next frames outward from the center, ensuring they’re level and spaced correctly. Continue referencing your photo or template as you go.
By taking these steps—using painter’s tape, creating frame templates, and maintaining consistent spacing—you’ll achieve a gallery wall that looks expertly designed. With a little patience and attention to detail, your gallery wall will become the perfect focal point in your space.
Step 4: Finishing Touches
After all the frames are up, take a step back and make sure everything looks straight and even. If needed, make any small adjustments by gently shifting the frames or adjusting the hardware.
- Fill in holes: If you made any extra holes while adjusting your frames, now’s the time to patch them up and touch up the paint.
- Add extra touches: For a final polish, consider adding decorative elements like plants, small sculptures, or other art objects that complement your gallery wall.
A gallery wall is more than just a collection of frames—it’s a personal expression of your style, memories, and creativity. Whether you opt for a sleek grid, a dynamic staggered layout, or a collected mix of artwork, you’ll have a one-of-a-kind display that reflects who you are. With a little planning and the right tools, you can easily create and hang the perfect gallery wall to enhance any space in your home.
At FrameWorthy, we offer a variety of custom frames to suit any gallery wall style. Need help getting started? Our framing experts are here to guide you every step of the way!

The FrameWorthy.com Team is made up of expert framers with years of experience in the art of custom framing. Passionate about preserving your cherished memories, artwork, and keepsakes, their valuable insights, tips, and tricks come from a deep understanding of framing techniques, materials, and design. Whether you're looking for the perfect frame style, matting options, or advice on protecting your items, the FrameWorthy team is dedicated to making custom framing easy and accessible. Trust their expertise to guide you in creating beautiful, lasting displays for your home, office, or gallery.

