
This blog post provides a step-by-step guide to framing your canvas art with ease. From selecting the right hardware to securing your canvas in place, our expert tips ensure a professional-looking finish. Whether you're using canvas clips or offset clips, we break down the installation process so you can display your artwork confidently. Perfect for beginners or anyone looking to enhance their home decor, this tutorial simplifies the canvas framing process for a flawless result.
At FrameWorthy.com, our passion is helping you showcase your photos and artwork in the best way possible. Whether the canvas is a gorgeous work of art or a cherished family portrait, framing it provides a professional finish. We know that the process of installing a canvas into a frame can be intimidating, especially when it comes to choosing the right hardware for the job. But don't panic! With our step-by-step guide, you’ll find that framing a canvas is easier than you think.
Installing Your Canvas into a Custom Frame
We’ve broken down the process into simple, easy-to-follow steps. Just keep scrolling to see how you can perfectly install your canvas into your new custom canvas frame or floater frame.
Canvas Clips Installation
Canvas clips hold your canvas securely within the frame by creating tension. Depending on the size of your frame, we’ll provide you with the exact number of clips you need to ensure a snug fit.
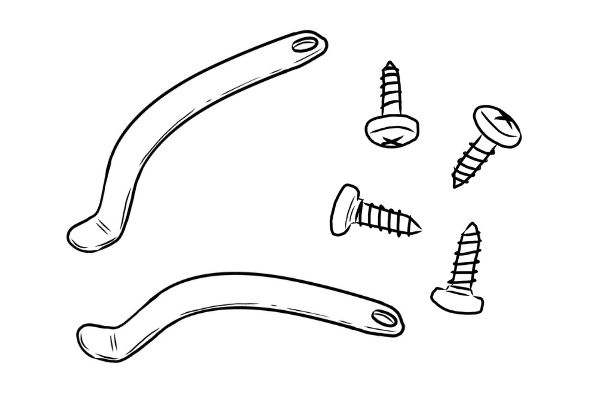
What’s Included in Your Canvas Clip Packet:
- Canvas Clips Hardware
- Canvas clips
- Screws
Additional Tools You’ll Need:
- Screwdriver
How to Install Canvas Clips
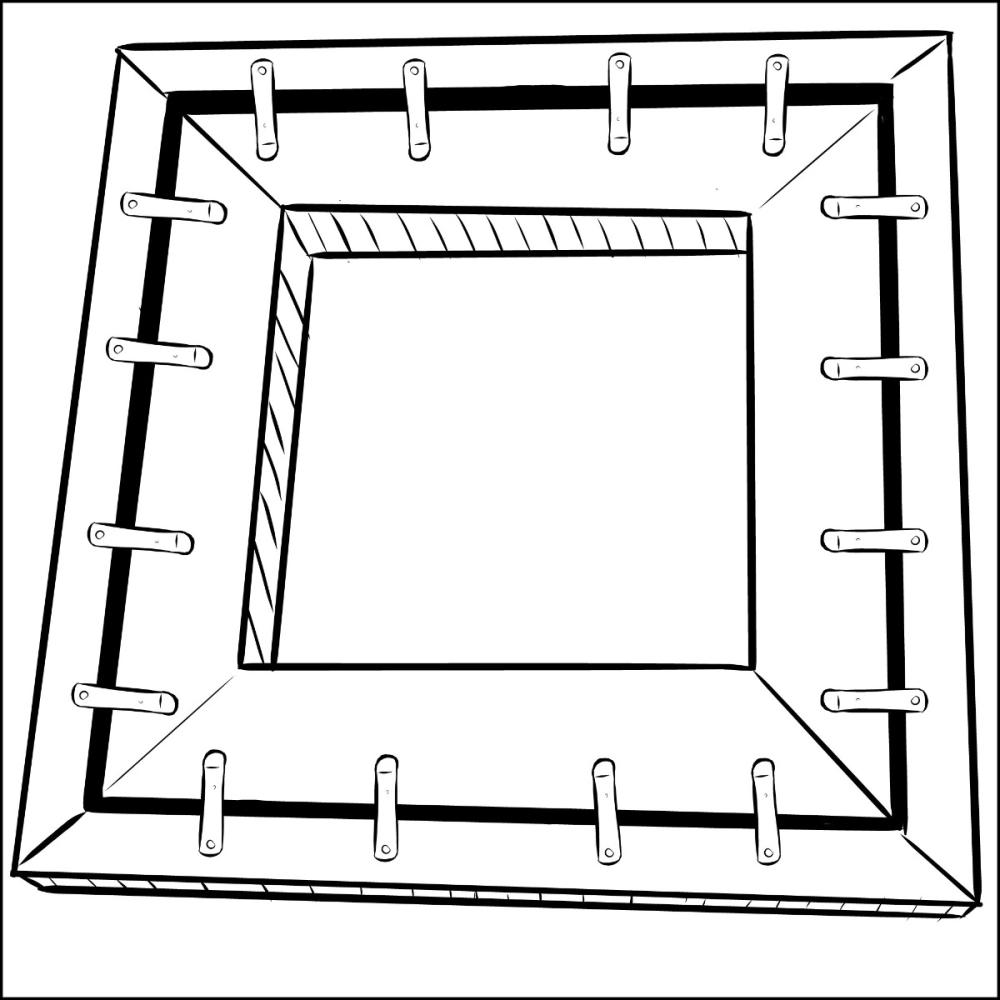
Step 1: Lay Out the Clips
Begin by laying out the canvas clips evenly around the back of the frame. This ensures that the canvas will be uniformly supported on all sides, preventing any sagging or unevenness once it's hung or displayed.
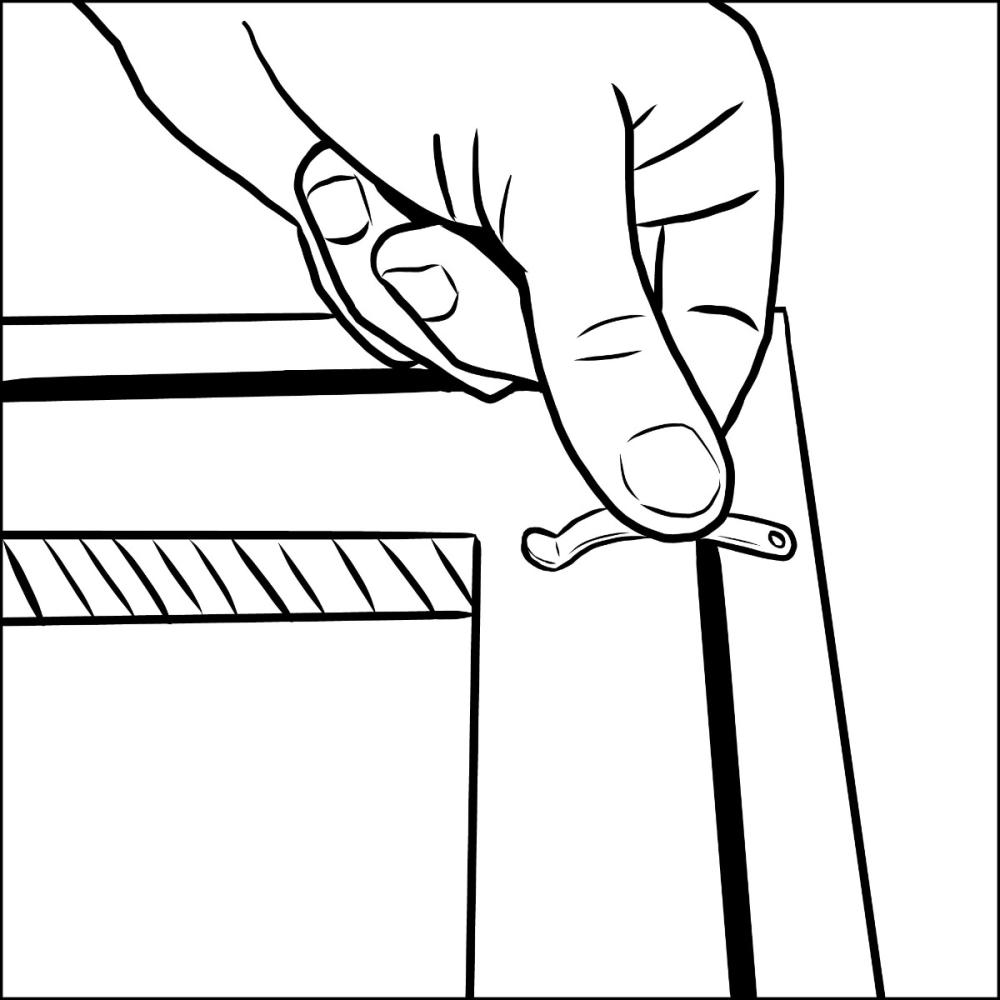
Step 2: Position the Clips
Take each clip and place the side with the hole onto the frame, ensuring that the arch of the clip points towards the back of the frame. The arch should be positioned to create tension that will hold the canvas securely in place.
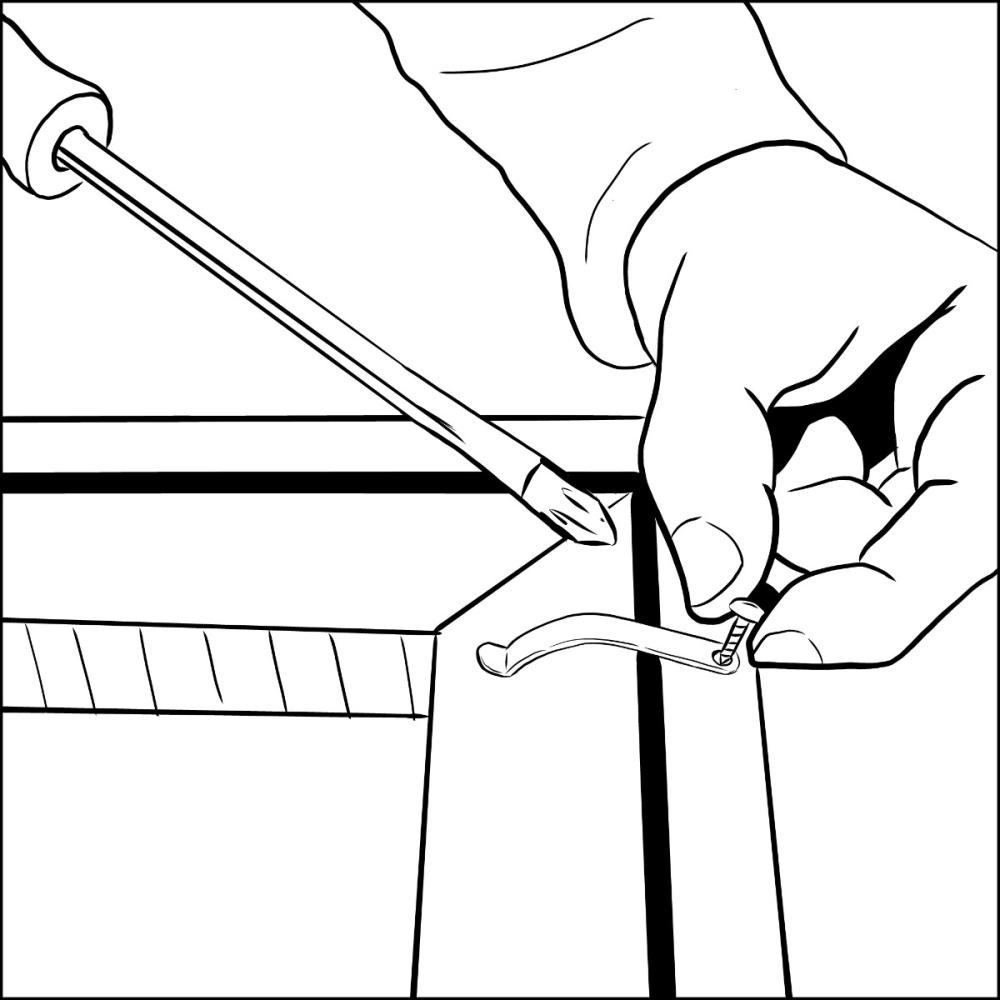
Step 3: Secure the Clips
Using the screws provided in your kit, secure each clip to the frame. Tighten the screws just enough to hold the canvas firmly without warping the frame or damaging the canvas. Repeat this process for all the clips until your canvas is securely fastened.
Offset Clips Installation
For canvases placed in floater frames, offset clips are ideal for securing the canvas. They are easy to use and designed to keep your canvas snug and secure within the frame, giving it that professional, floating look.
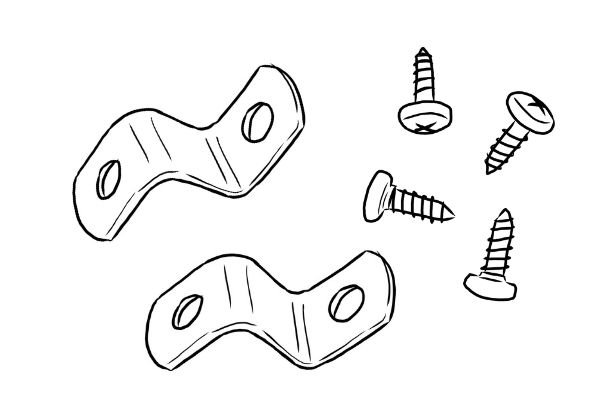
What’s Included in Your Offset Clip Packet:
- Offset Clip Hardware
- Offset clips
- Screws
Additional Tools You’ll Need:
- Screwdriver
How To Install Offset Clips
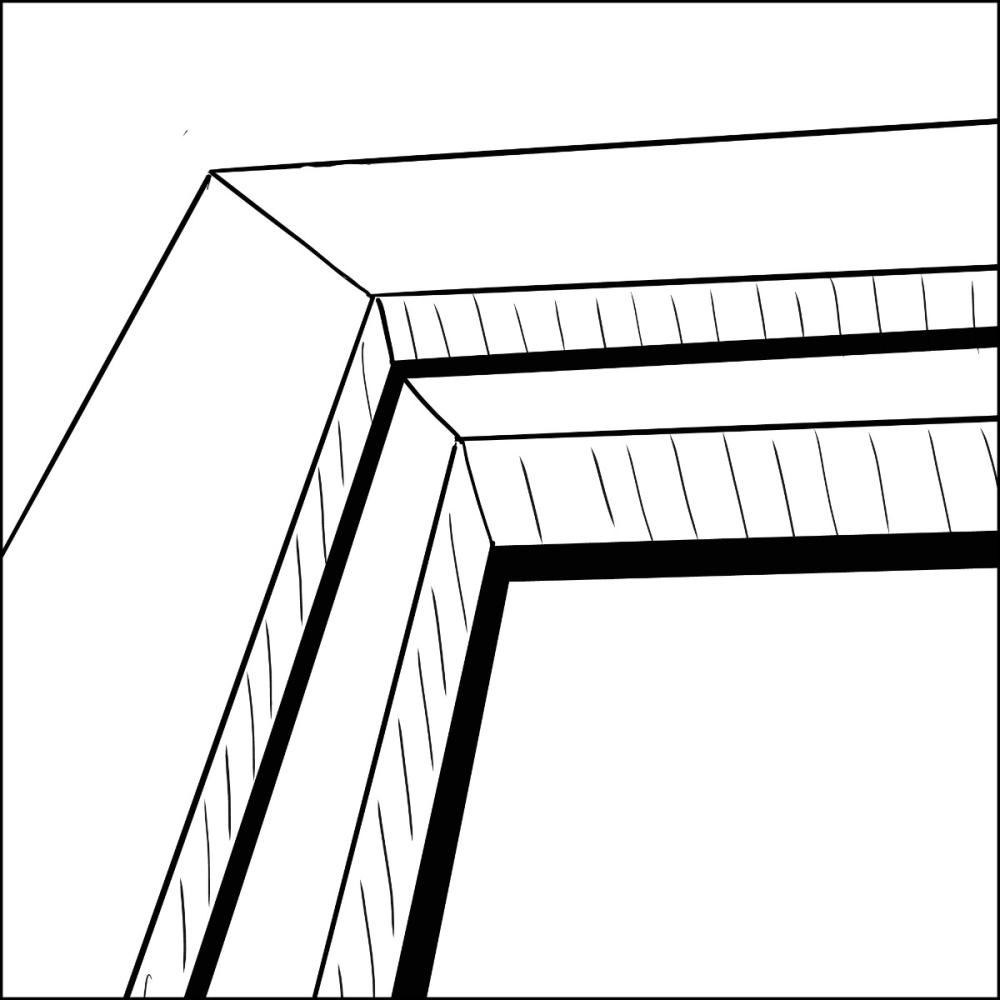
Step 1: Align the Canvas with the Frame
Carefully align the mitered edges of the frame with the edges of your stretched canvas. This step is crucial to ensuring that the canvas sits perfectly within the frame, creating a seamless floating effect.
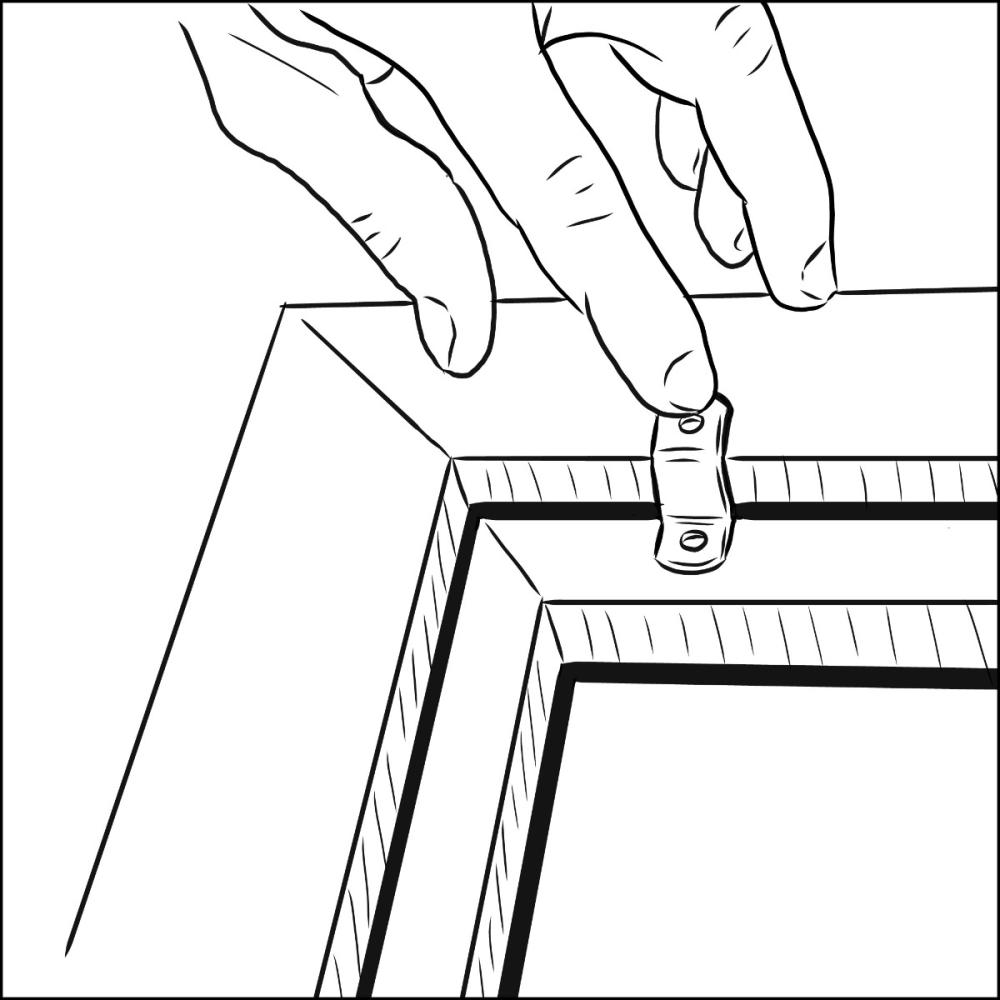
Step 2: Distribute the Clips Evenly
Evenly distribute the offset clips around the back of the frame. Position the clips so that they support the canvas at key points, especially at the corners and along the sides, to prevent any movement or shifting.
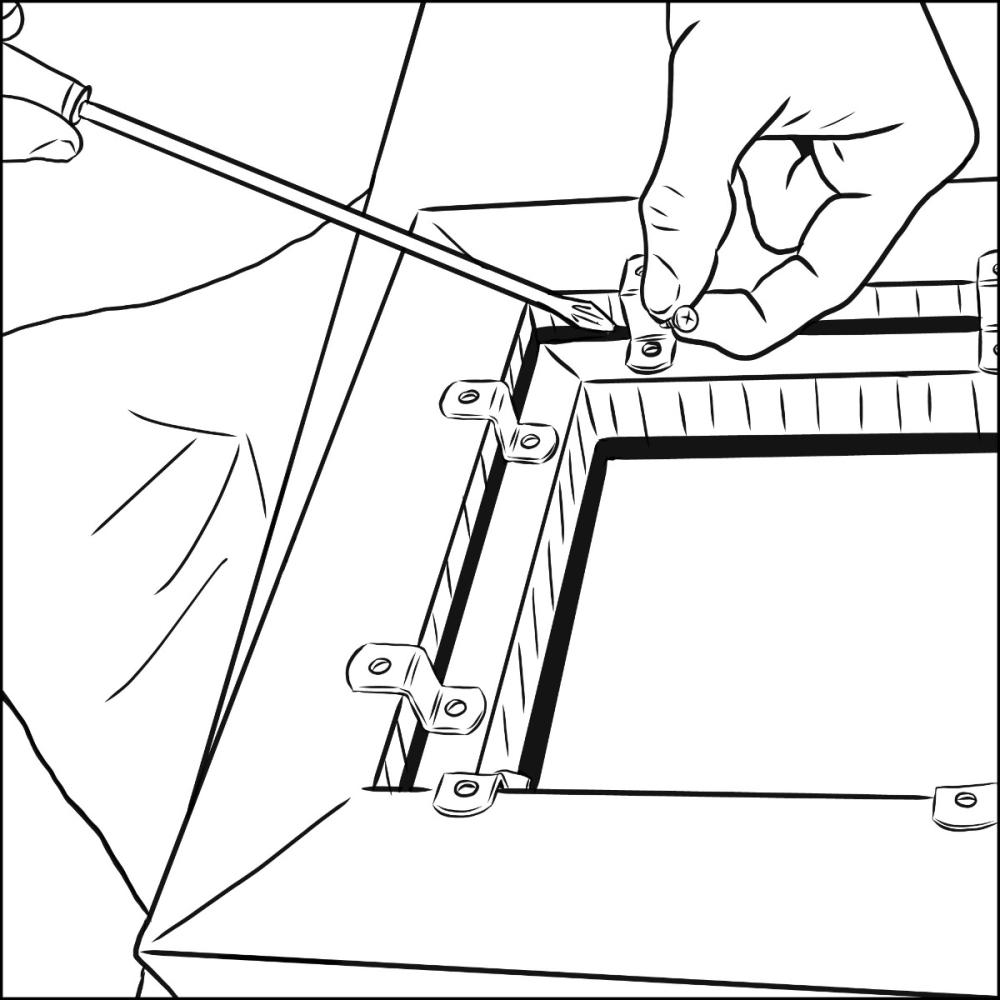
Step 3: Attach the Clips
Using the provided screws, attach the offset clips to the canvas. Make sure each clip is securely fastened to keep the canvas stable. For extra stability, use the remaining screws to secure the clip to the frame as well. This double attachment ensures that your canvas will stay in place, even if the frame is moved or bumped
Final Steps: Adding Hanging Hardware
Once your canvas is securely installed inside the frame, you’re ready to add the hanging hardware. Whether you prefer wire, D-rings, or sawtooth hangers, we’ve got detailed instructions to help you get it just right. Check out our guide here to learn how to properly install your chosen hanging hardware.
Need Assistance?
If you have any additional questions about installing hardware or hanging your custom frames, don’t hesitate to reach out. Our team of framing experts is always here to help. Contact us at hello@frameworthy.com, and we’ll be happy to assist you.
At FrameWorthy.com, we’re committed to making custom framing accessible and straightforward, so you can focus on what matters most—enjoying your beautifully framed artwork.

The FrameWorthy.com Team is made up of expert framers with years of experience in the art of custom framing. Passionate about preserving your cherished memories, artwork, and keepsakes, their valuable insights, tips, and tricks come from a deep understanding of framing techniques, materials, and design. Whether you're looking for the perfect frame style, matting options, or advice on protecting your items, the FrameWorthy team is dedicated to making custom framing easy and accessible. Trust their expertise to guide you in creating beautiful, lasting displays for your home, office, or gallery.


